Tips to creating your Community Garden
- Step 1: Locating and Possibly Purchasing Land/Space
Perhaps the most difficult part about starting up a community garden is finding a location for it to be placed. Contrary to popular belief, most gardens don’t have to take up much space at all; in fact, you can construct a perfect garden in just a few square feet.
Here are some things to think about:
Who is involved in this project? If you’re... planning it for your school, there’s a huge possibility that your building owns a good amount of land. Consider asking your principal or other school administrators about taking up a portion of the space, small or large. I know from experience that it’s hard for them to turn down a good cause, especially when it involves the students.
What connections do you have? You may be surprised at what you can obtain. Does your dad own a field on the outskirts of town? Does an aunt or uncle own a nice square of grass on Third Street? Don’t be afraid to ask about putting these plots of land to good use.
Is land even really that hard to buy? There’s a broad market for property sales, especially in Kentucky. After looking, it’s easy to see that a lot of these offers are extremely reasonable. Search in newspapers, ask around, and don’t give up.
Lastly, don’t worry about funding the original purchase of land too much. The school may pay, and if you’re not with a school, there’s a variety of fundraising options.
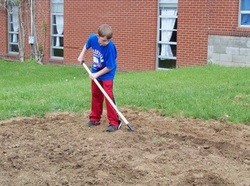
Step 2: Supplies and Tools
Alright, you’ve got your
space. Congratulations! All that’s left is gathering your supplies to begin your
garden experience. What do you need, exactly?
Bricks or some kind of
separating factor. Plants will not grow correctly if they are too close or in
direct contact with an outside ecosystem. This is why no one plants vegetable
seeds in the middle of their yard and gets something
out of it. Make a separate space for your garden, like a raised garden bed, a
pot, or tiny fencing.
Soil. This one is pretty obvious, but I’d just like
to elaborate. At WalMart, 2 cubic feet of Miracle Gro is only $7. It’s what we
use.
Tools. Remember, old things are good things. Don’t forget that old
shovel in the corner of your garage or the dusty bucket in your attic.
Everything can be used! If you look hard enough, it’s a rarity that you’ll have
to buy anything new. That’s always good.
There’s no doubt that
we all yearn to participate in something greater than ourselves. A community
garden is a great way to satisfy this need, but who wants to take part in your
community? Here’s a few tips on finding “co-workers”, if you will:
Newspaper advertising. This does cost money, but not much. Here in Western KY
with the Kentucky New Era, 5 lines for 10 days... is $60.
This may stretch your budget, but it broadcasts your project like nobody’s
business.
Word of mouth.This is free and works well. Tell everyone you know
and don’t know about what you’re doing. You’ll be astounded at the number of
people who will actually want to be involved.
Schools/Students. Go to local
schools and ask if students want to be involved. At our local high school,
there’s a new volunteering requirement, and a community garden would fill that
requirement. If you work in the school system or are part of it, then you
obviously have direct contact with students. Don’t be afraid to ask. It brings
results and helping hands.
Step 4: Stick With It
A community garden is a long-term commitment and can bring joy, just
like a pet or a sport. Ensure that you have or can make time to continuously
maintain your established garden. Don’t allow your work to go to waste. You can
do this by asking your volunteers to do their part and possibly fill your shoes
when you can’t be there for your plants.
